Step 6 - Create .cor file or tax return print
After a T2 return passed the validation process, you can create a .cor file for Internet filing; or generate a printable PDF file (Print function) for the tax return. A sample printable PDF file can be downloaded here.
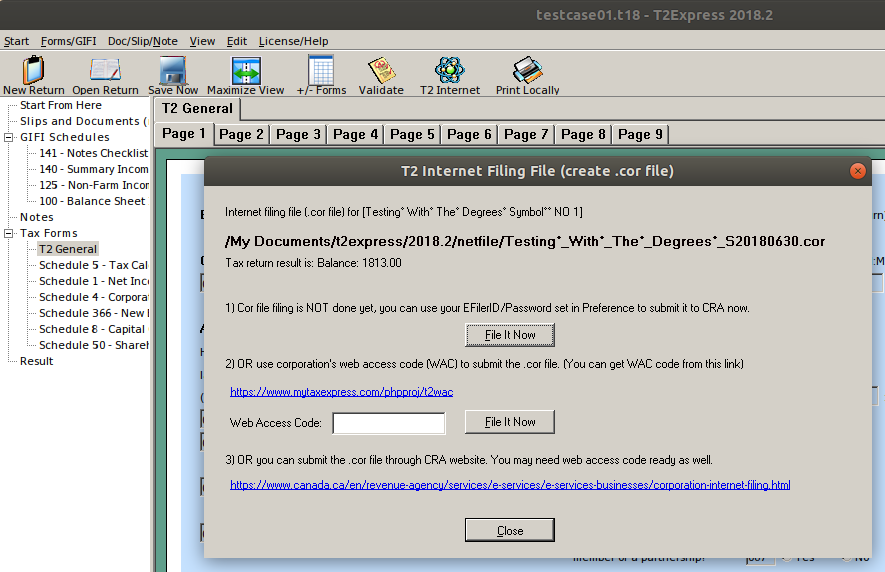
- EFile the return by the software if you have a valid Efiler ID/password set up in the software.
- Netfile the return by the software if you have a WAC (Web Access Code).
- Upload the cor file manually through the CRA website Corporation Internet Filing page.
Here is a short video to demonstrate the process.
Click the T2 Internet icon to create a .cor file, as shown below. Or use the menu Filing/Print > T2 Internet Filing (cor file).
You may also see some informational messages after clicking the T2 Internet icon. Simply click the OK button to proceed.

In the older version, the icon is named Create .cor File.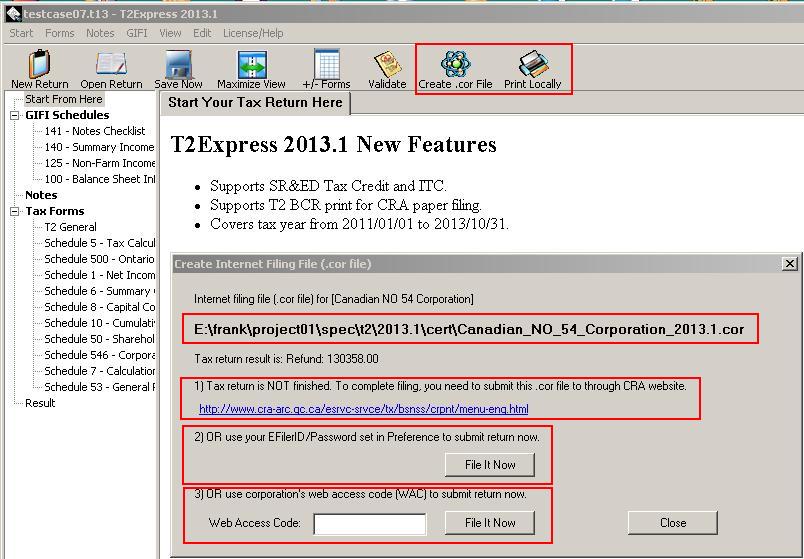
When you file a return in the software directly with your Efiler ID/Password or with WAC, a message window will pop up with a confirmation code if the return is accepted by the CRA system, as shown in the screenshot below.
Similarly, an error message will be displayed if the return is rejected if data in the return file doesn't match some CRA records. In this case, follow the message to correct each error, save the return and try to file again.

Related FAQs
- Where to get Corporate Internet Filing (CIF) web access code (WAC)?
- How to create tax return print?
- Step 1 - Create a new T2 return
- Step 2 - Work on income statement schedule 125
- Step 3 - Add balance sheet information GIFI Sch100 ( and Sch101)
- Step 4 - Add/remove other tax forms
- Step 5 - Validate the T2 tax return